

 Book An Appointment



Updated Distal Biceps Fixation: New Arthrex Tension Tight Biceps Button
Dr. Garcia specializes in complex knee, shoulder and elbow sports surgeries. He has prepared a number of surgical videos below to help patients better understand their procedures. He is frequently updating his surgical video database so check back soon for further updates.
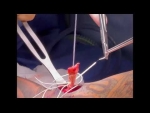
This video features Dr. Grant H. Garcia demonstrating an updated distal biceps tendon repair technique utilizing an innovative, low-profile tensioning implant system. This advanced implant is designed to significantly streamline how a ruptured biceps tendon is tensioned and seated deep inside the bone socket, offering a smoother workflow compared to traditional button designs.
Here is a summary of the procedure shown in the video:
- Tendon Mobilization and Stitching: The surgeon isolates and exposes the ruptured distal biceps tendon, thoroughly cleaning away surrounding damaged tissue. To secure the graft, he uses a specialized, slightly thicker braided link suture. Because this heavy-duty suture does not feature a pre-attached needle, a free needle is used to execute a series of secure, interlocking passes down the center of the tendon.
- Suture Sizing and Trimming: The edges of the stitched tendon are carefully trimmed and checked. This ensures the construct is properly uniform, which allows it to glide smoothly into the matching bone socket without binding or catching on the cortical margins.
- Preparing the Bicortical Tunnel: Turning his attention to the forearm, the surgeon exposes the radial tuberosity footprint. He drills a guide pin unicortically into the centered bone bed, followed by an 8mm reamer to establish the main socket depth. The surgeon then carefully switches to a smaller drill bit to perforate the far (posterior) cortex of the radius, maintaining an precise angle to completely avoid injuring the nearby posterior interosseous nerve (PIN).
- Passing the Implant: The specialized fixation button is loaded onto the suture limbs and pushed completely through the newly drilled radius. Once it clears the far side of the bone, it flips and seats flat against the posterior cortex. The surgeon notes that this specific updated design is highly reliable, pulling entirely flush against the bone surface so it cannot accidentally slide out or shift out of alignment.
- Dunking and Seating the Tendon: With the patient's forearm held in maximum supination and the elbow resting in a relaxed flexed position, the surgeon applies tension to the suture limbs. By utilizing a gentle rocking motion, the thick biceps tendon is gradually pulled deep down into the centered bone socket.
Dr. Garcia emphasizes that this updated tensioning button makes the final fixation step substantially easier. Because the implant securely self-locks the tendon down into the bone bed as you pull, it eliminates the high-friction struggle of manually holding tension while tying knots, resulting in an exceptionally strong, rigid repair.